Sealing your crawl space is a critical step in protecting your home from moisture, pests, and mold. By lowering heating and cooling expenses and stopping air leaks, it can help increase your home’s energy efficiency. If you’re noticing musty smells, increased humidity, or cold floors, it might be time to consider sealing your crawl space. This tutorial will show you how to properly seal your crawl area and create a more secure and energy-efficient living place.
Why Sealing A Crawl Space Is Important?
When it comes to home upkeep, a crawl area is sometimes disregarded, although it is essential to the general well-being of your house. Unsealed crawl spaces can invite moisture, which can lead to mold growth, wood rot, and even structural damage over time. Additionally, pests such as rodents, insects, and other critters may make their way into your home through these unsealed areas.
Sealing your crawl space helps create a barrier against moisture and pests, as well as preventing cold air from entering during the winter months. This process also contributes to energy savings by making your home more energy-efficient.
Step 1: Inspect The Crawl Space
Before beginning the sealing process, it’s important to inspect your crawl space thoroughly. This will help you identify any areas of concern, such as moisture buildup, mold growth, or pest activity. Look for gaps, cracks, or holes in the foundation walls, as well as any visible signs of water infiltration. If you find standing water or excessive moisture, it may be necessary to address the source of the water before proceeding with sealing.
To guarantee that any mold or mildew is totally removed, think about hiring a professional or applying a mold removal treatment.
Step 2: Clean The Crawl Space
Once you’ve inspected the area, the next step is to clean the crawl space. Remove any debris, dirt, or insulation that may have become damaged. It’s important to clear the area to ensure that the vapor barrier and other sealing materials can be applied effectively.
You should also check the existing insulation to see if it’s been damaged by moisture or pests. If it has, it may need to be replaced. Ensure that the crawl space is as clean and dry as possible before moving on to the sealing process.
Step 3: Install A Vapor Barrier
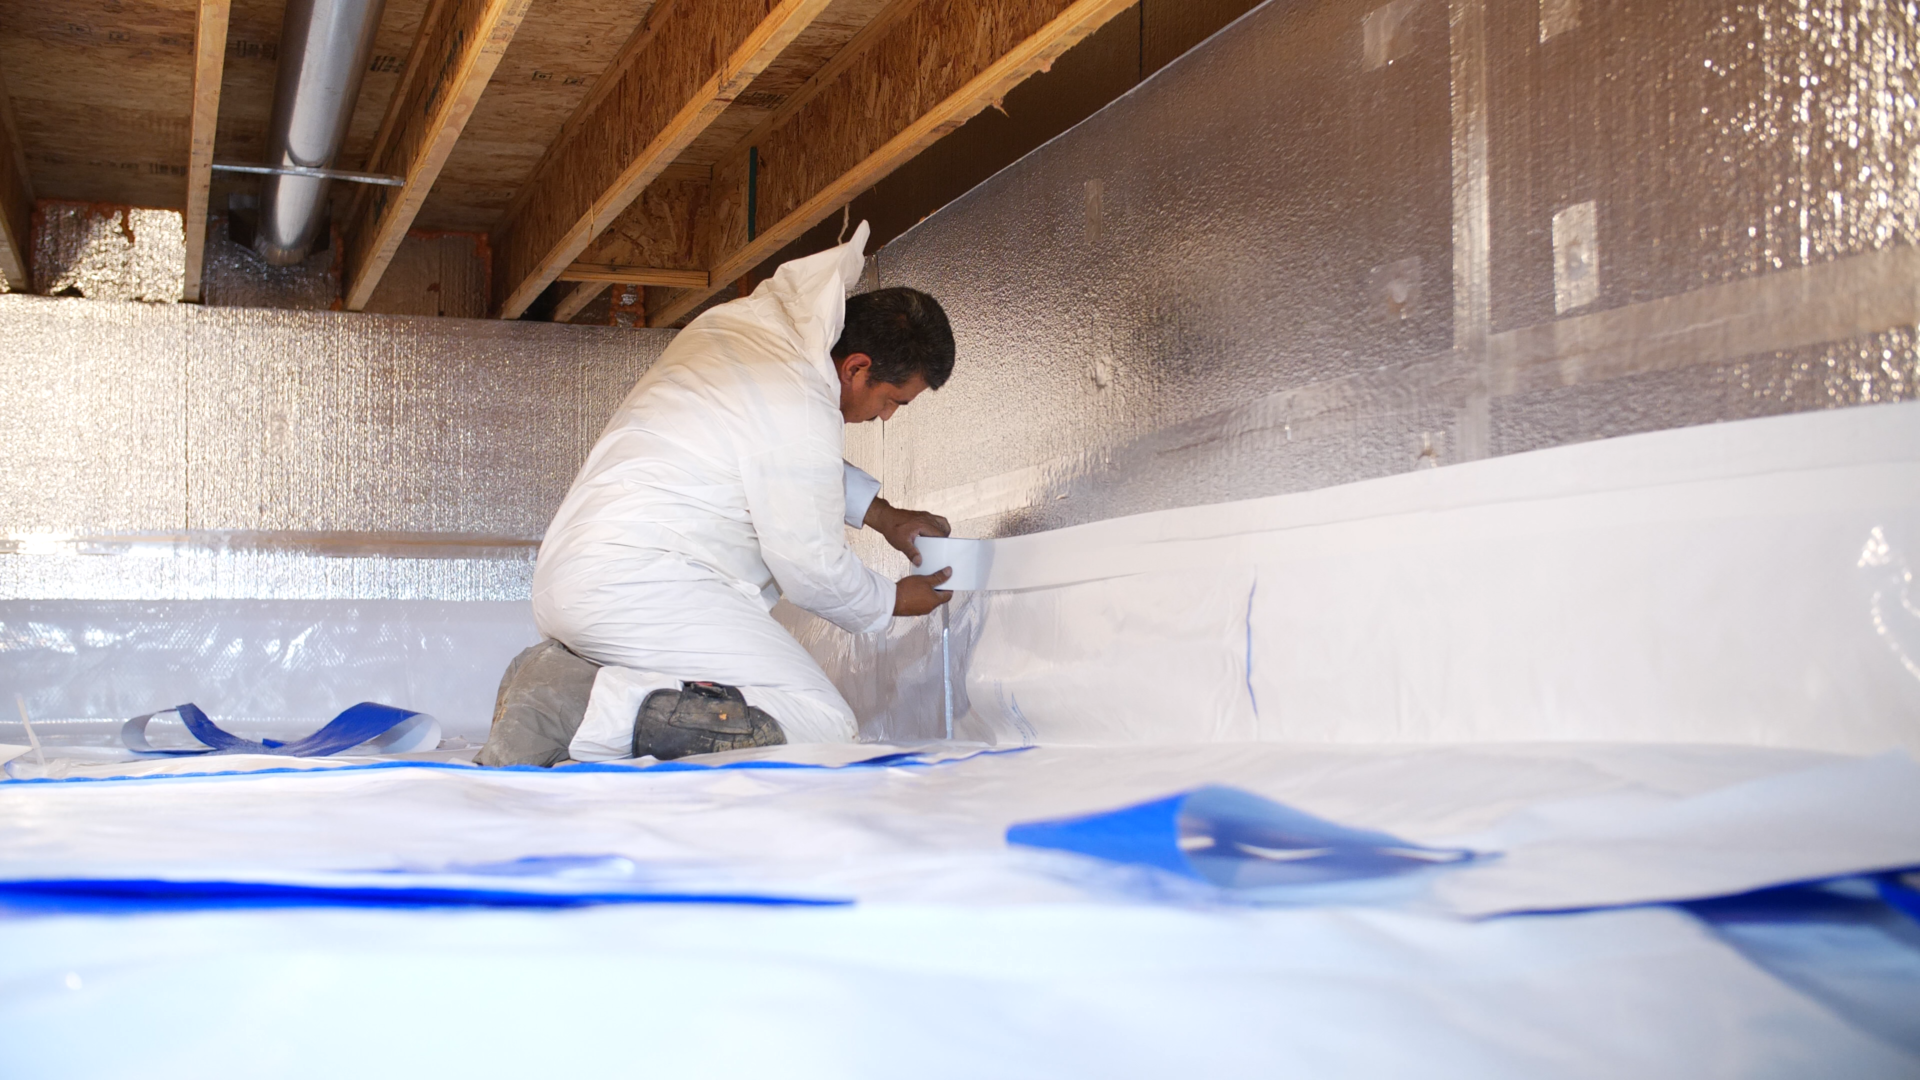
A vapor barrier is one of the most important components of sealing your crawl space. Usually composed of polyethylene, this plastic covering keeps moisture from the ground from getting into your crawl space and producing problems like mildew and wood rot.
Begin by laying the vapor barrier over the floor of the crawl space. Make sure it extends up the walls, creating a complete barrier. In order to guarantee full coverage, overlap any seams by a minimum of twelve inches. Seal the seams and edges with tape or adhesive designed for vapor barriers to prevent any moisture from getting through.
It’s important to ensure that the vapor barrier is installed tightly to the walls and floor, with no gaps or wrinkles, as these could allow moisture to penetrate the crawl space.
Step 4: Seal Cracks And Gaps
Next, focus on sealing any cracks or gaps in the foundation walls or floor. You can use caulk, expanding foam, or other appropriate sealing materials to fill these gaps. This step is essential in preventing air from entering or leaving your crawl space, which will improve energy efficiency and help prevent pest infestations.
Ensure that you cover any vents or openings that are not necessary for ventilation. These can allow cold air in during the winter or warm air out during the summer, both of which can affect your home’s overall temperature.
Step 5: Consider Insulating The Crawl Space
While sealing the crawl space is a significant step, adding insulation can further enhance its effectiveness. Insulation will keep the area warmer during winter and cooler during summer, preventing your HVAC system from working overtime. Insulating your crawl space can also reduce the risk of pipes freezing during extreme temperatures.
You can use rigid foam board insulation or spray foam insulation for this step. Ensure that the insulation is applied to the foundation walls, and consider installing it along the crawl space ceiling for additional energy savings.
Step 6: Ensure Proper Ventilation
In some cases, it’s essential to maintain proper ventilation in your crawl space. Without ventilation, moisture can accumulate, which could negate the benefits of the vapor barrier. If your crawl space is prone to high moisture levels, it may be necessary to install a dehumidifier or consider mechanical ventilation solutions to keep the air circulating.
Consider hiring a professional to assess the ventilation needs of your crawl space if you’re unsure about how to proceed. A step-by-step guide on how to seal a crawl space effectively can help you determine whether or not ventilation is necessary in your particular situation.
Step 7: Regular Maintenance And Inspection
Once your crawl space is sealed, regular maintenance is crucial to ensuring that the barrier remains effective. Check the area every few months to look for signs of moisture, pests, or damage to the vapor barrier. Keeping an eye on the crawl space will help you address potential issues before they become major problems.
Conclusion
Sealing your crawl space is an essential step in maintaining a healthy, energy-efficient home. By following these steps and ensuring that your crawl space is properly sealed, you can protect your home from moisture, pests, and energy loss. For a more comprehensive look at the process, consult a detailed guide to ensure you’re taking the necessary precautions. Sealing your crawl space will benefit your house and family for years to come, whether you decide to do it yourself or hire a professional.